
New build snagging checklist
What to check in your new build, inside and out, from what our own reports check.
Before you start
How to use this checklist
Most snags are small and easy to fix. The point is to find them all at once and hand your developer one list they can work from.
Go round in daylight, room by room
Start outside, then take each room in turn, and finish in the loft if it's safe to get in. Faults in finishes show up along a wall against the light, so look along surfaces, not just at them.
Number every item and name the room
Write the list the way a report is written: a number for each item and the room it's in, so when you chase your developer about item 14 there's no doubt which one you mean.
Photograph everything, then send it as one list
A photo of each fault, with the problem circled if you can, and one written list to your developer rather than messages as you find things. Keep a copy and the date you sent it.
Part 1
Outside
Start outside while the light is good. Most of this is visible from the ground and the garden.
External Areas & Landscaping
- Brickwork and render: look along each wall in daylight for cracks, gaps in the mortar and staining or splashes left behind by the trades.
- Paths, paving and the driveway: slabs sit level and don't rock, and the surface falls away from the house, not towards it.
- Ground levels and the damp-proof course: soil, paving and bark sit below the DPC line, never piled against the wall.
- Fencing, gates and landscaping: posts upright, gates that latch, and turf and planting finished right to the boundary.
Roof & Accessible Loft Space
- From the ground: tiles or slates lying flat with none slipped, and flashings tucked in at chimneys and wherever a roof meets a wall.
- Fascias, soffits and guttering fixed and joined, with no gaps where water or birds can get in.
- In the loft, where it's safe: insulation laid evenly and not stuffed into the eaves, no daylight showing, and the pipes and any tank insulated.
Windows & External Doors
- Every window and external door opens, closes and locks without force, and the gaps around each one look even.
- Glazing checked in daylight for scratches and cracks, with the seals and beads unbroken inside and out.
- Thresholds, frames and sills sealed to the wall with no gaps, and the handles and trickle vents all working.
External Levels & Drainage
- Paving and slab levels fall away from every door.
- Drainage channels, gullies and downpipe outlets clear and connected, with no low spots where water will sit after rain.
Garage & External Structures
- The garage door opens and closes smoothly and seals at the floor and down each side.
- The floor level and finished, the walls and lighting complete, and any external store built with its door fitted.
- Visible drainage outside the garage connected and clear.
Part 2
Inside
Then every room in turn, including the cupboards, the utility and the loft hatch.
Internal Finishes
- Walls and ceilings: look along them against the light for lumps of filler, sanding marks and patches that were never painted.
- Skirting, architraves and joinery fixed tight, with the joints filled and painted rather than left open.
- Internal doors open, close and latch without catching, with an even gap at the head and down each side.
- Decoration complete in every room, including inside cupboards, behind doors and up the stairwell.
Kitchens & Utility Areas
- Units level, doors and drawers aligned, and the worktops sealed at the wall and around the sink.
- Every appliance connected and run through a cycle, with the waste connections dry afterwards.
- Sockets working, and the extractor and any other ventilation running.
Bathrooms & Sanitaryware
- Run every bath, shower, basin and WC, then check under and behind each one for leaks.
- Tiling flat with the grout complete, sealant continuous along every edge, and the extractor fan running.
- Visible plumbing finished, with pipe penetrations collared rather than left as bare holes.
Heating & Plumbing
- The boiler and heating controls working, and every radiator heating top to bottom, not just at the pipes.
- Hot water reaching every tap, wastes running freely, and visible pipework clipped and finished.
Visible Electrical Installations & Functional Checks
- Every socket, switch and light working, with a plug-in socket checker if you have one.
- The consumer unit labelled, and the smoke, heat and CO alarms fitted and tested.
From a real report
What the list looks like when it's done properly
Two issues from one of our reports, word for word, and a one-page summary.
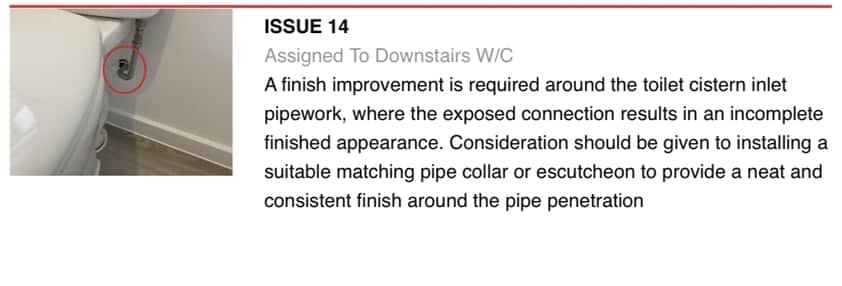
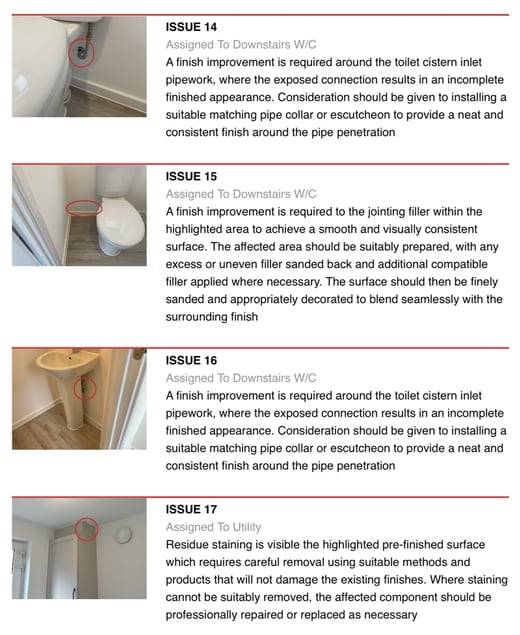
Issue 14, assigned to the downstairs w/c. 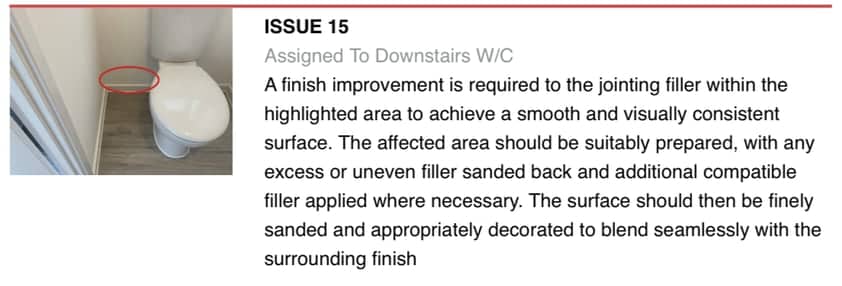
Issue 15, assigned to the downstairs w/c.
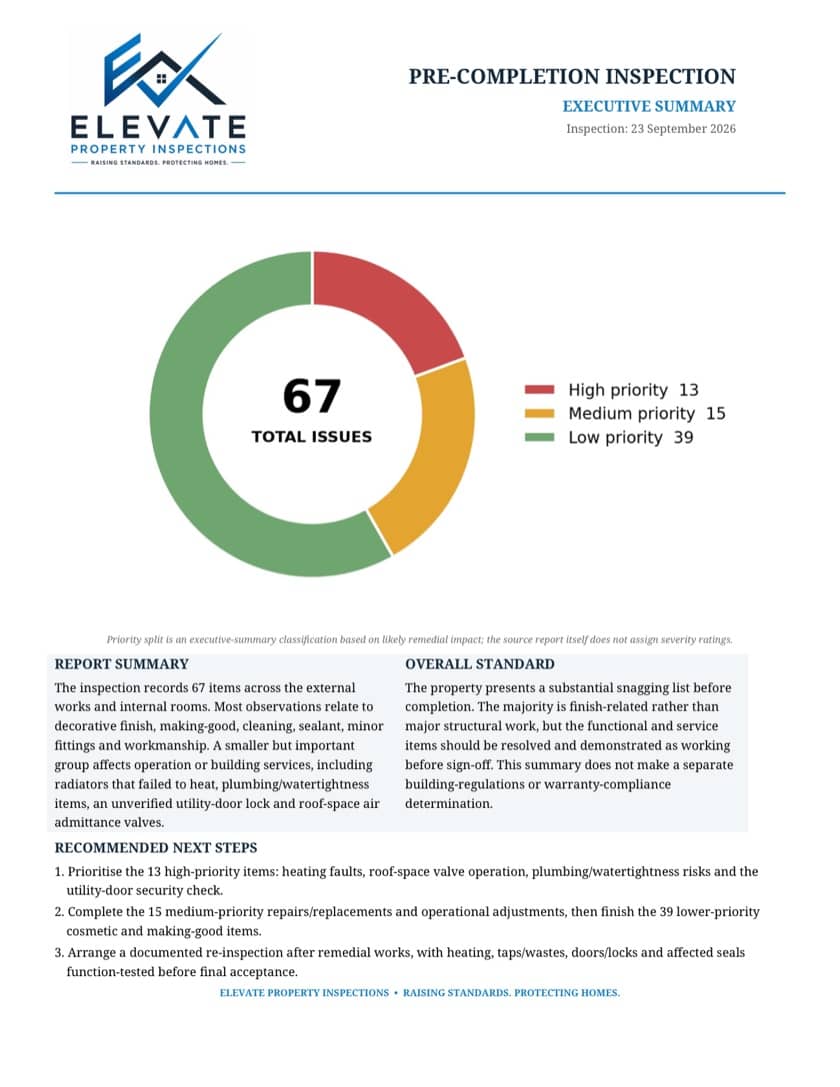
Both are finishing items: a pipe collar missing around a cistern inlet, and jointing filler that was never sanded back. Neither is dramatic, and both are exactly what gets missed on moving day. On the inspection shown here, our report recorded 67 items: 13 high priority, 15 medium and 39 low, and the one-page summary shows at a glance which mattered most.
Beyond the list
What a walk-round can't tell you
Everything above is worth doing yourself. These four are the part of every Elevate inspection that a checklist can't replace.
- Moisture Checks
Non-invasive moisture readings to identify areas that may require further investigation.
Damp rarely shows on the surface in a new house. A meter finds it before a stain does.
- Thermal Imaging
Targeted thermal imaging to identify temperature anomalies, potential heat-loss areas, cold spots and possible insulation or installation irregularities.
A camera shows a cold spot, a missing run of insulation or a radiator that is not heating evenly, none of which you can see.
- Safety & Functionality
Doors, windows, stairs, guarding, alarms, trip hazards and general functional checks.
Guarding heights, stair pitches and alarm positions are judged against standards, not by eye.
- Workmanship & Finishes
General quality of construction, finishing and installation, with defects assessed against relevant standards and tolerances where applicable.
The hard part is knowing what is within tolerance and what is not. That judgement comes from years on site.
Questions
Snagging your own home: your questions
If yours isn't here, ring us and ask.
Can I do my own snagging with this checklist?
Yes, and it's worth doing. Walk the house in daylight with the list, photograph everything you find and note the room, and send your developer one written list rather than messages as you go. What a walk-round can't give you is the moisture readings, the thermal imaging and the judgement of what is within tolerance, which is what a professional inspection adds.
How should I give my snagging list to the developer?
In writing, with a number against each item, the room it's in and a photograph, so there's no doubt which item you mean when you chase it. Keep a copy and the date you sent it. That's the format our reports use, because it's the format developers can work from.
How much does a professional snagging inspection cost?
Snagging is priced by the size of the property: £275 for a 1 to 2 bed, £345 for a 3 bed, £400 for a 4 bed, £475 for a 5 bed, and from £500 for a large or complex property. A re-inspection after the repairs is £125. Nick inspects every home himself and writes every report.
Elsewhere
Where we inspect
If you'd rather we did the walk-round, these are the places with their own page, and how to book.
Call or message us
Nick carries out the inspection, writes the report and answers every question, so this number reaches him directly.
